
Customer List
This report will give you a detailed list of all customers within your specified date range. .
- To run a the CUSTOMER LIST report, first locate the REPORT MANAGER in the BackOffice.
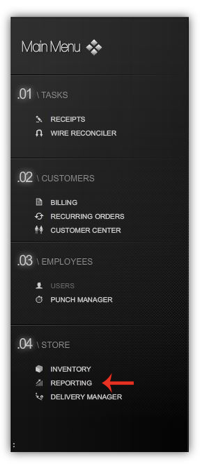
- Select the REPORTING button from the STORE section of the MAIN MENU on the left side of the screen.
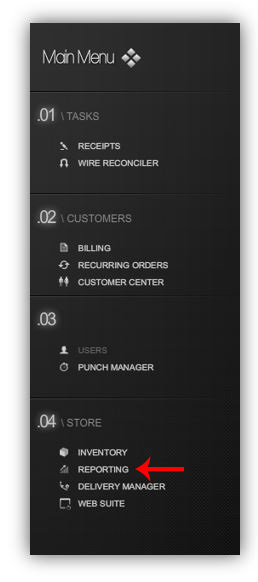
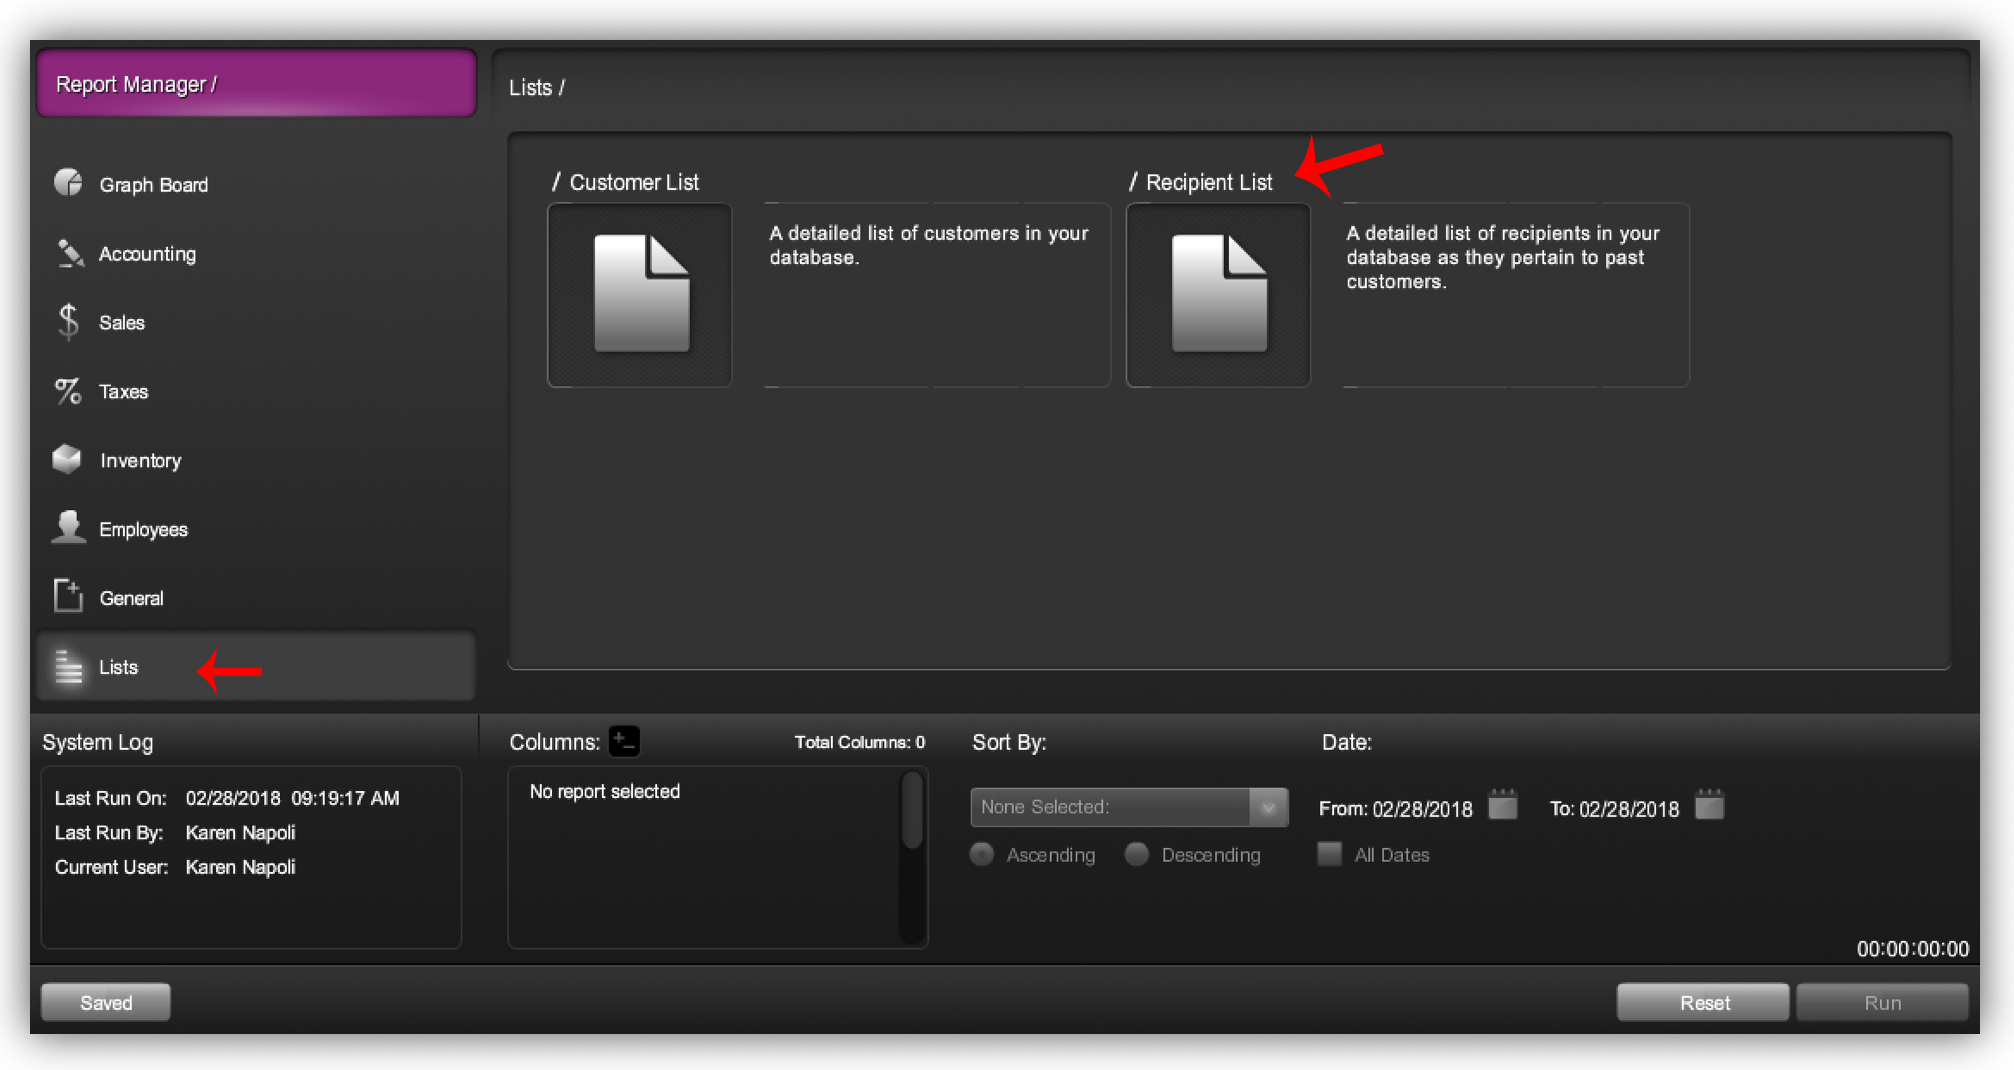
- Once in the REPORTS MANAGER, select the LISTS tab on the left side of the screen.
- From the list, choose the CUSTOMER LIST report.

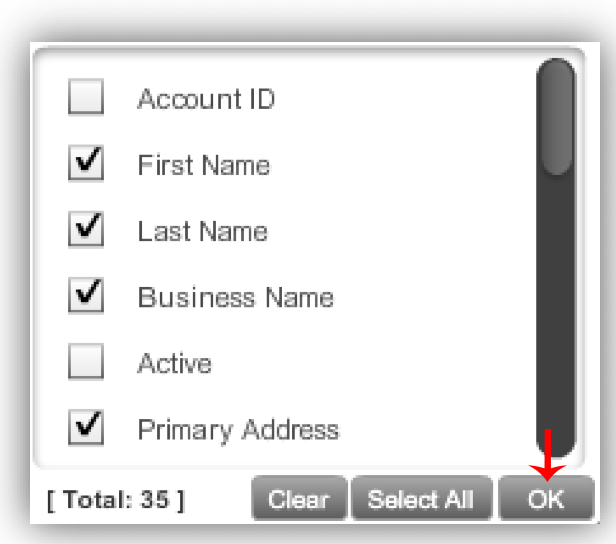
- After selecting the CUSTOMER LIST report, select the column icon
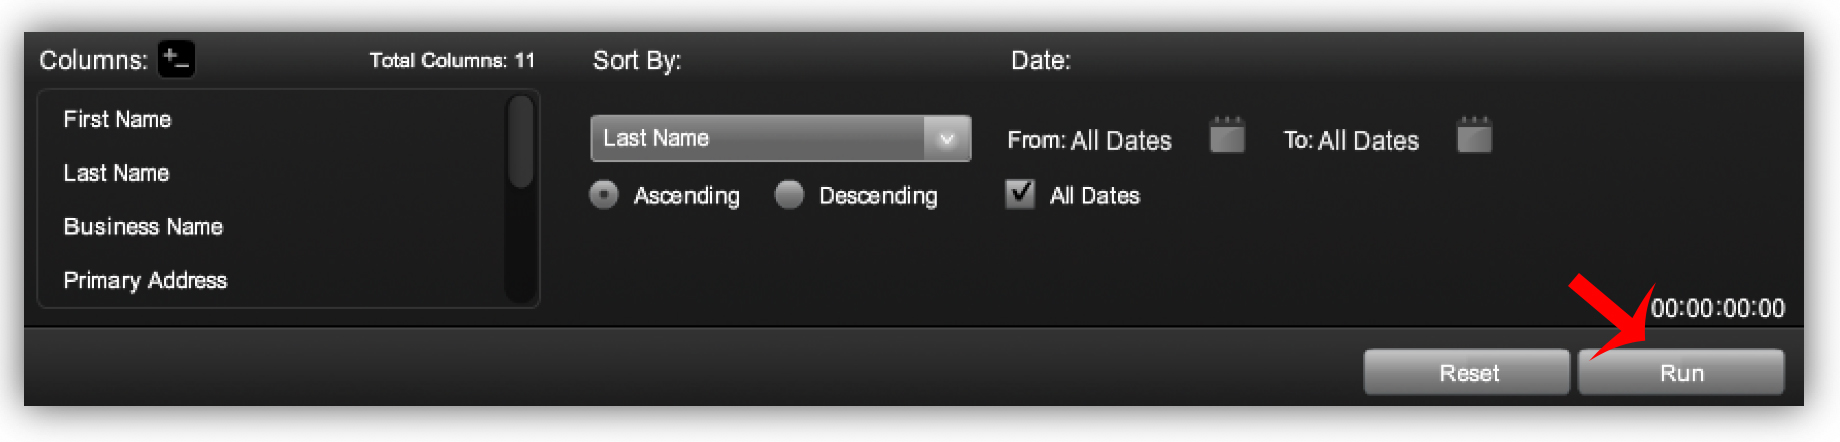
 check the desired attributes you would like included in the list: First Name, Last Name, Business Name, Primary Address, Secondary Address, City, State, Zip 1, Zip 2, Primary Phone, and Email are pre-selected. You can choose to add additional attributes from the list.
 - When all desired columns have been selected, click OK.
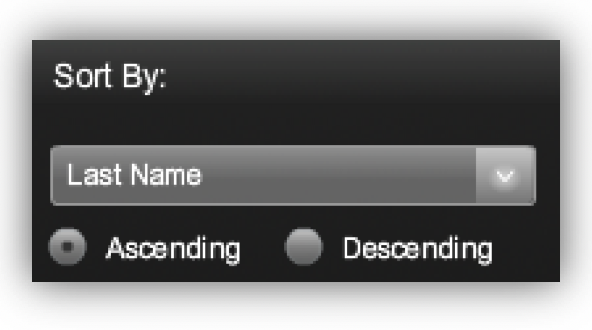
- Once the desired columns have been selected, next select how you would like the report sorted. You can choose to have the report sorted by the customer's First Name, Last Name, Business Name, Primary Address, Secondary Address, City, State, Zip 1, Zip 2, Primary Phone, Email or any additional attribute. If you have no preference, the report will be sorted by default.

- You are also able to choose if you would like your report sorted ascending or descending order. If you have no preference, the report will be sorted ascending by default.
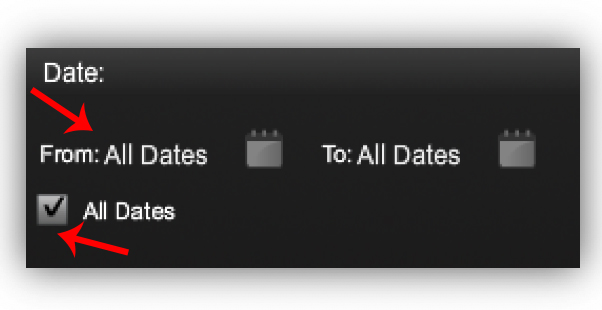
- After you have set your sort by preferences, if any, select the desired date range to be included in the report. If using all dates, check the ALL DATES box.
- Once you have entered all desired criteria, click RUN.
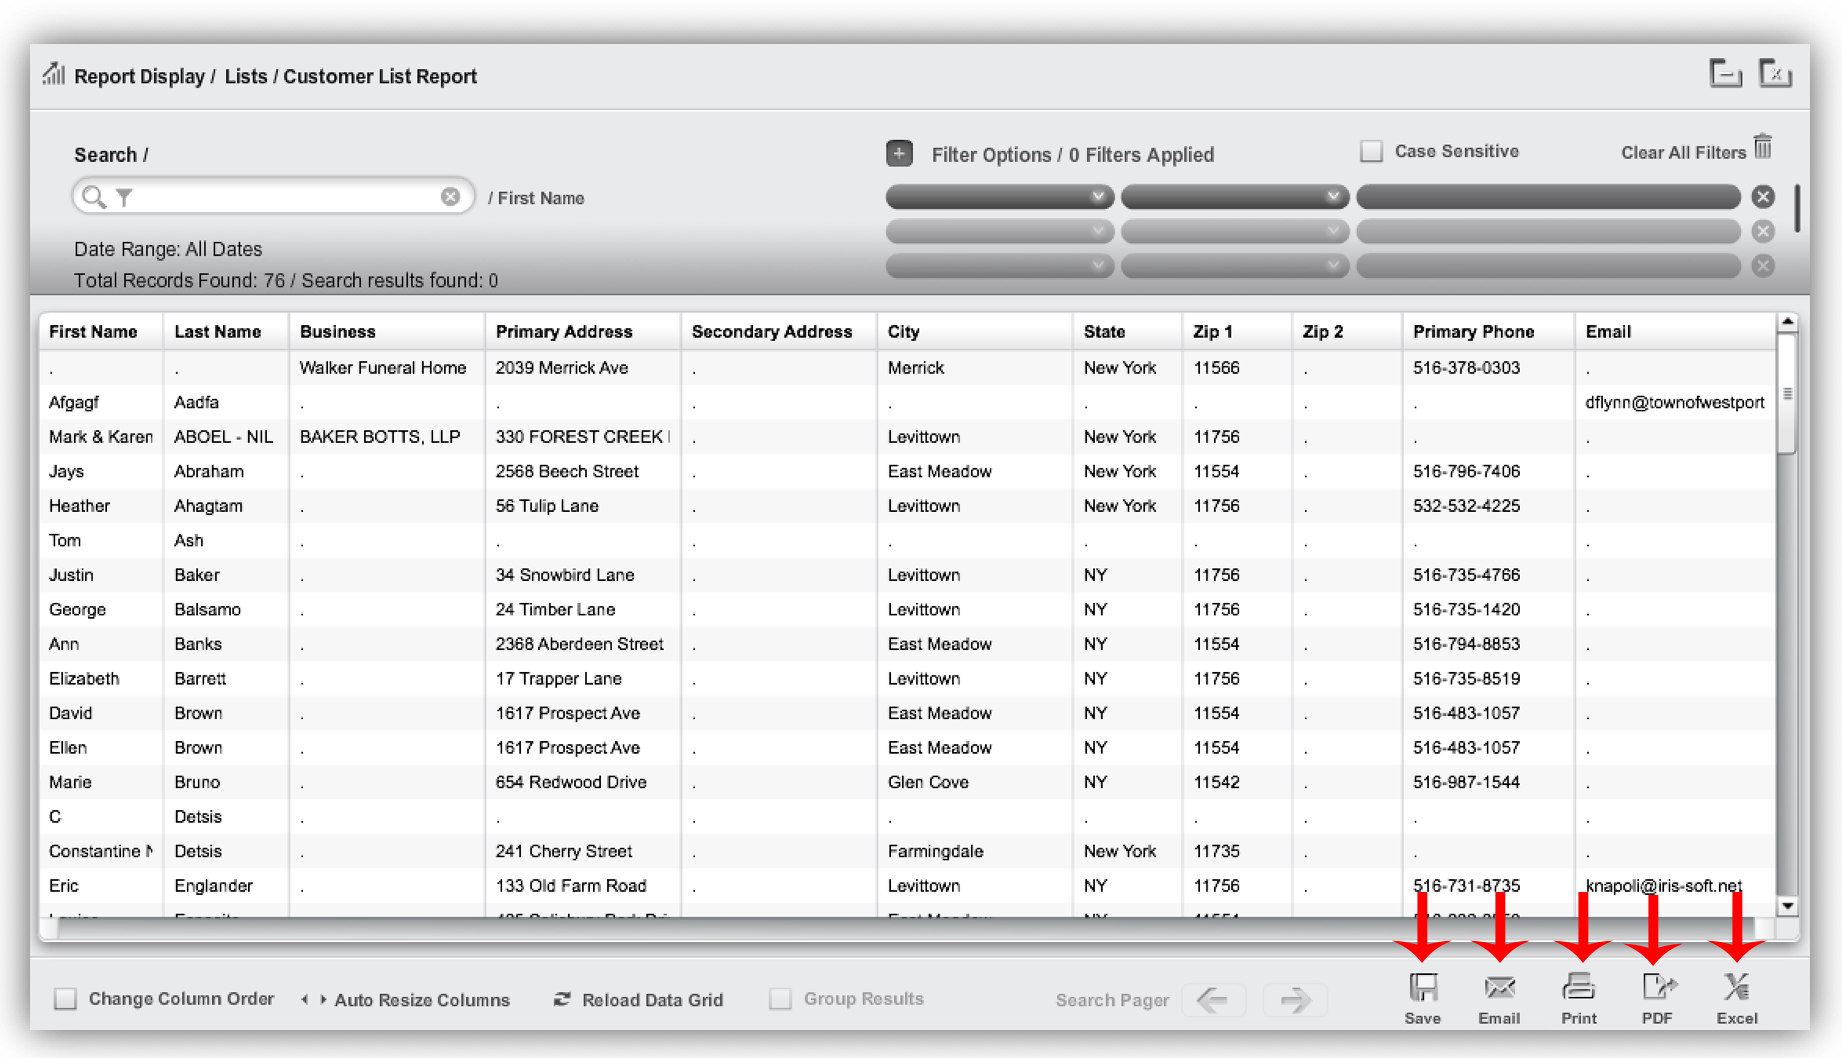
- A CUSTOMER LIST report will generate.
- To save the report, click the SAVE icon.
- To email the report, click the EMAIL icon.
- To print the report, click the PRINT icon.
- To export the report to a PDF, click the PDF icon.
- To export the report to an EXCEL document, click the EXCEL icon.
Recipient List
This report will give you a list of all recipients within your specified delivery date range.
- To run a the RECIPIENT LIST report, first locate the REPORT MANAGER in the BackOffice.
- Select the REPORTING button from the STORE section of the MAIN MENU on the left side of the screen.
-
- Once in the REPORTS MANAGER, select the LISTS tab on the left side of the screen.
- From the list, choose the RECIPIENT LIST report.
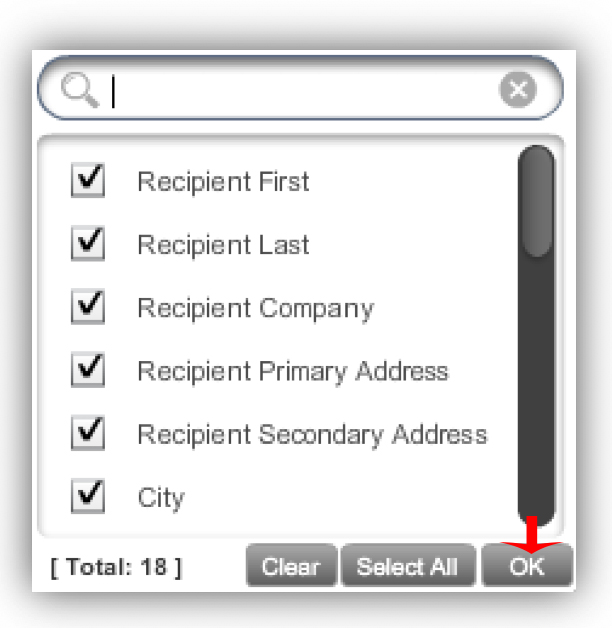
- After selecting the RECIPIENT LIST report, select the column icon check the desired attributes you would like included in the list: Recipient First Name, Recipient Last Name, Recipient Business Name, Recipient Primary Address, Recipient Secondary Address, City, State, Zip 1, Zip 2 and Recipient Primary Phone are pre selected. You can choose to add additional attributes from the list such as Delivery Date.
- When all desired columns have been selected, click OK.
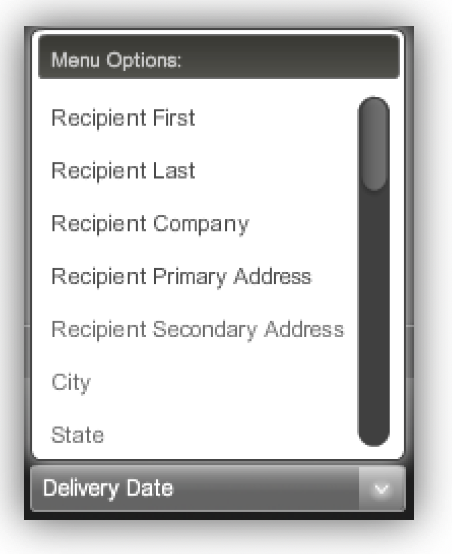
- Once the columns have been selected, next select how you would like the report sorted. You can choose to have the report sorted by: Recipient First Name, Recipient Last Name, Recipient Business Name, Recipient Primary Address, Recipient Secondary Address, City, State, Zip 1, Zip 2, Recipient Primary Phone or any additional attribute. If you have no preference, the report will be sorted by default.
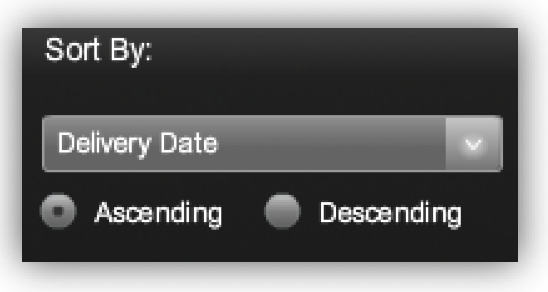
- You are also able to choose if you would like your report sorted ascending or descending order. If you have no preference, the report will be sorted ascending by default.
- After you have set your sort by preferences, if any, select the desired dates to be included in the report. If using all dates, check the ALL DATES box.
- Once you have entered all desired criteria, click RUN.
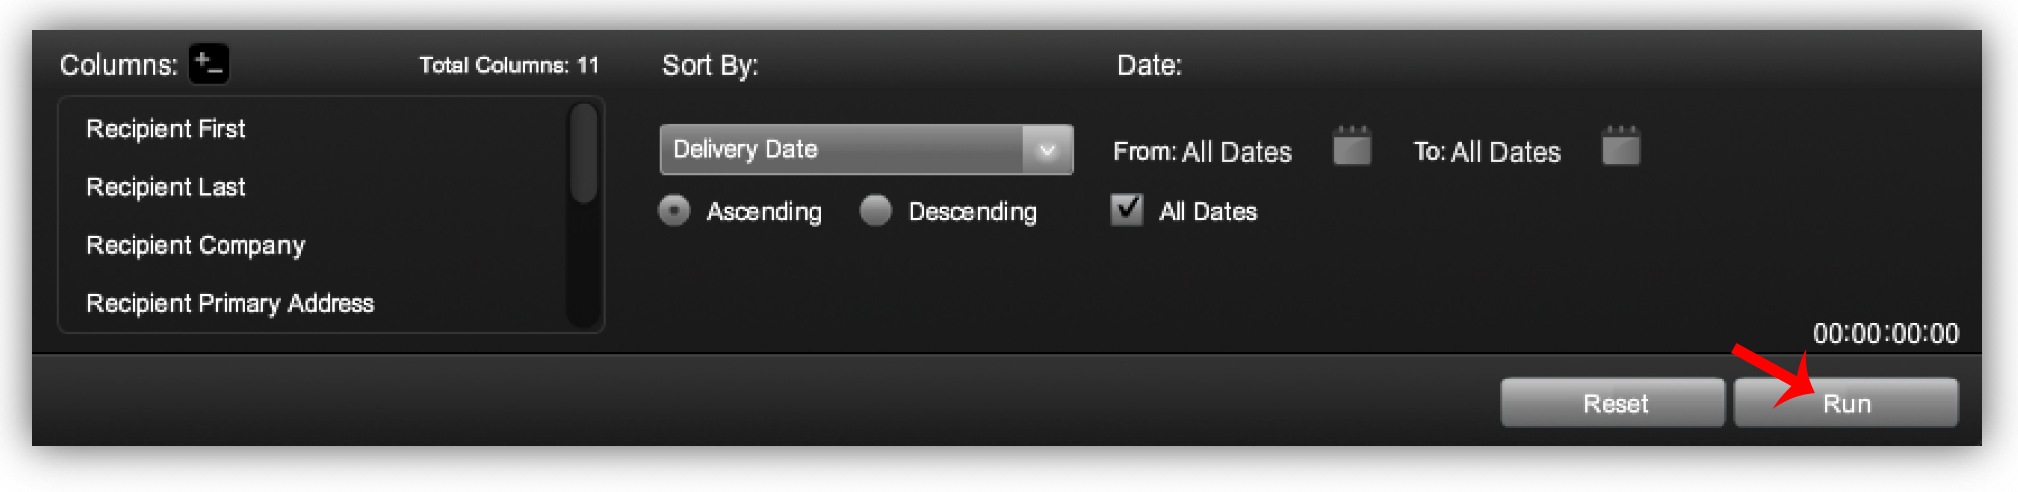
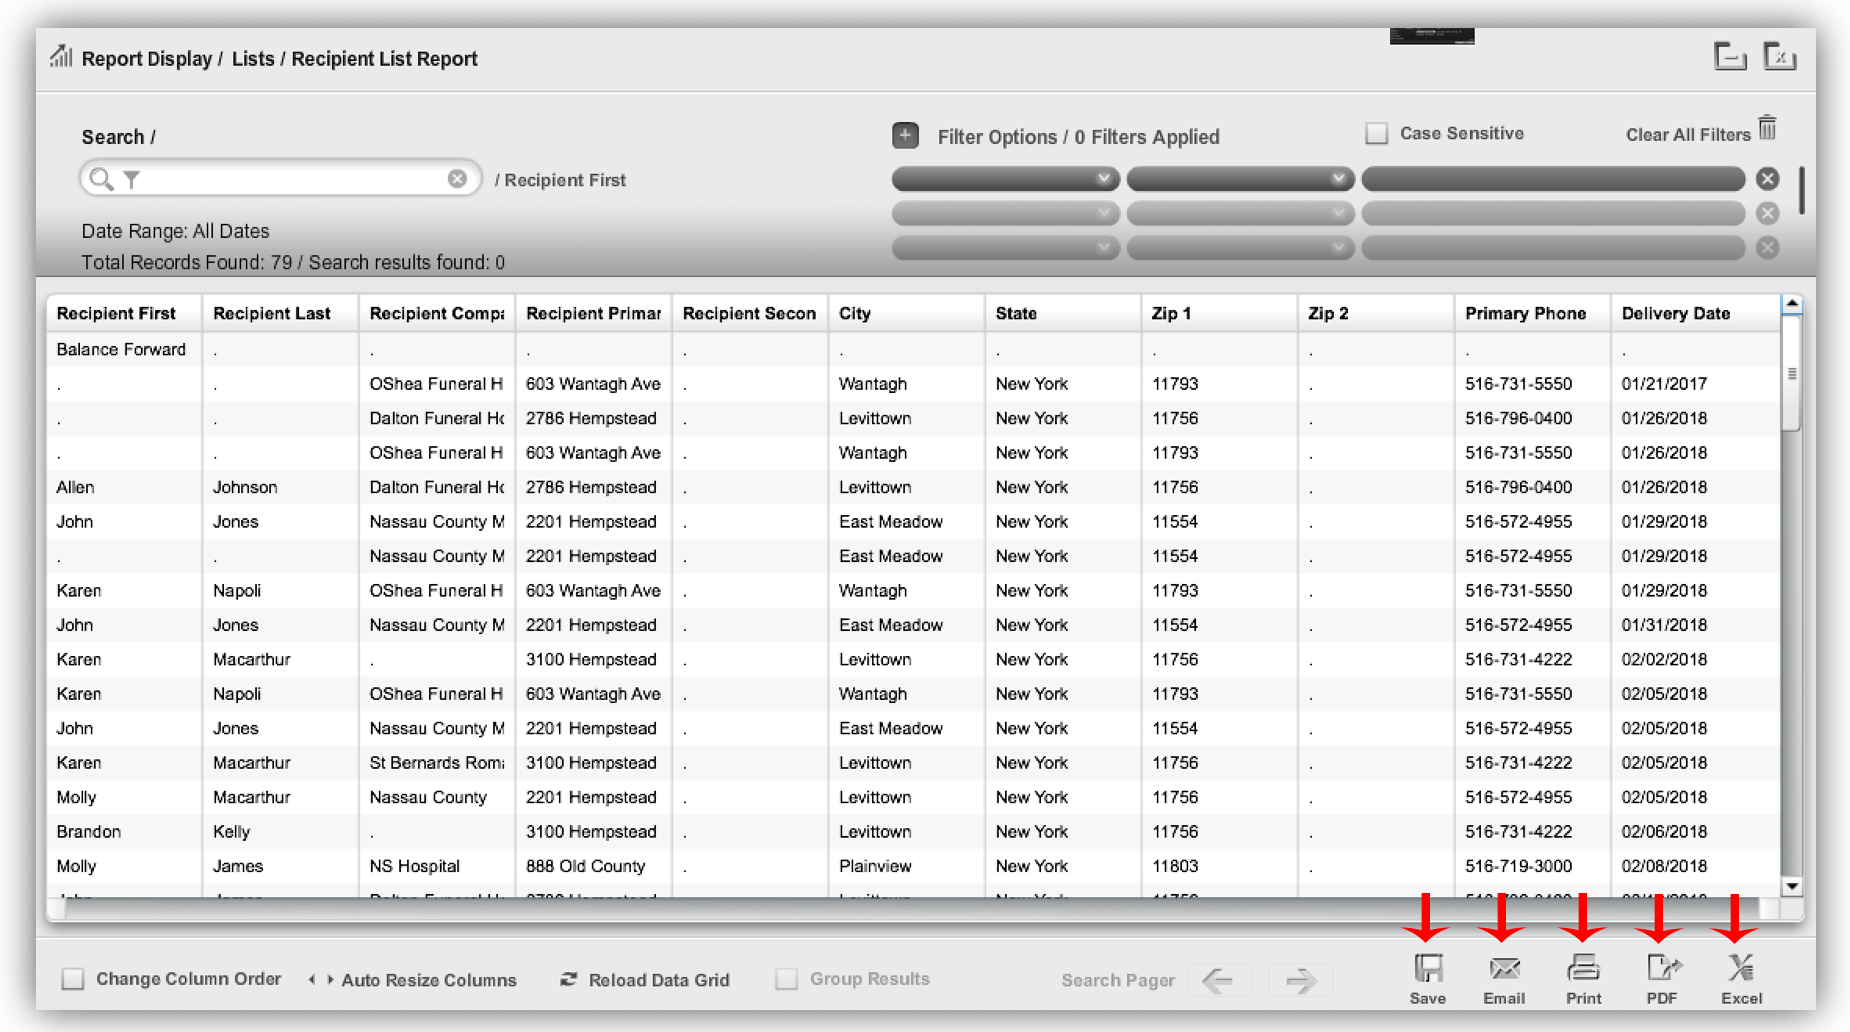
- A RECIPIENT LIST report will generate.
- To save the report, click the SAVE icon.
- To email the report, click the EMAIL icon.
- To print the report, click the PRINT icon.
- To export the report to a PDF, click the PDF icon.
- To export the report to an EXCEL document, click the EXCEL icon.
Comments
0 comments
Please sign in to leave a comment.